


March 2019
It’s been one heck of a great year.
Since last March, we decided to tackle some of the interior, and leave our cute lil original exterior the same (for now!)
Here is the current outside of our house! Not the biggest fan of the original black panel windows… but grateful for what it is right now!
& hey, taking photos to document what it looks like today will be so cool to look back on in a few years when it changes. :)

Now to show you what we tackled.

Both Original Bathrooms We Gutted & Remodeled Completely:
Our Original TEAL Bathtub Bathroom & Our Original Pink Shower Bathroom!


At first, Matt & I thought maybe we could turn these two bathrooms into something hip & retro-themed, and keep the tile! But after discussing options, we decided to wipe the slates clean and create from scratch. I’m all about the clean, bright look, so white tile was a must for the walls for both bathrooms.
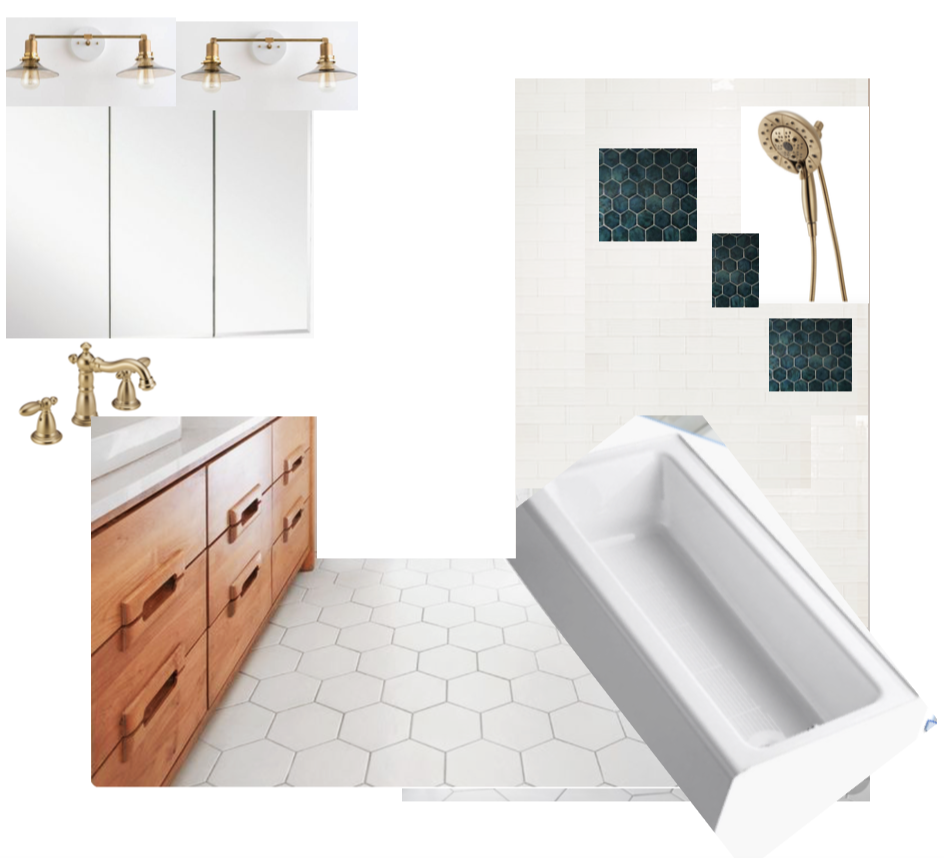
Here was my original mock-up sketch of what I wanted our teal bathtub bathroom to look like after it was finished! We ended up ditching the blue soap niche idea and sticking to timeless white.
Our bathroom went from this…

To this …


and this …


and this.

And this is the final transformation! A little upscale farmhouse, a little modern :). Champagne Gold fixtures allll the way!
Pro-tip: Remember that even when your tile palette feels too simple, when you spice up the bathroom with fixtures, linens, picture frames, and rugs, you can add as much color, texture, and pattern as you want — without doing it PERMANENTLY. Think of your bathroom remodel as a clean-slate design!
And as for our grungy pink shower bathroom …


We gutted it, extended the shower space, and viola! Spacious, open, & spa-like! We wanted a bit more of a modern-look with this bathroom.

(Yes, we have a big flat mirror that went under the light fixture!)


We love how BIG the shower became! Not only did we raise the height of the shower ceiling, create a step-down, and knock out some cabinets that were right where the shower head fixtures are now, but the white automatically makes the space feel larger!
Pro-tip: warm metal fixtures look great with neutral and/or cool rooms!

Our Kitchen Floor: From 3 Layers of Linoleum to Clean Tile!
Our family helped us scrape up THREE layers of different colored linoleum in order to install some nice, clean-looking tile. We chose the simple, light gray stone in hopes that whatever we decide to do with our kitchen one day, it will go with any style!

And pro-tip: if you don’t want dark colored flooring, then choose flooring that is visually hard to tell if it’s dirty! Like our concrete-colored bathroom flooring or this kitchen flooring that has a cloudy pattern to it!
(Saves you a lot of professional cleaning! But I still like my white hexagon tile…)

Doors + Cabinets: New, Clean, + Pretty HARDWARE!
I couldn’t believe how many doors & cabinets needed to be tossed & upgraded! It doesn’t sound like that big of a deal, but when your cabinet doors and regular doors are 70 years old, with too many layers of oil-based paint & water-based paint plastered on them (and it’s peeling off horribly)… it’s not worth sanding them down! Make sure to weigh the pros and cons before trying to install all new doors ;).

Thought I’d show you the pretty handles instead of a bunch of plain white (but thoughtfully crafted & hand installed) doors.
And we might have tackled a few more things not necessarily inside … here are two surprise glimpses!

Our Air BNB: Decked Out & Fully Operating!
This project might have been our favorite.
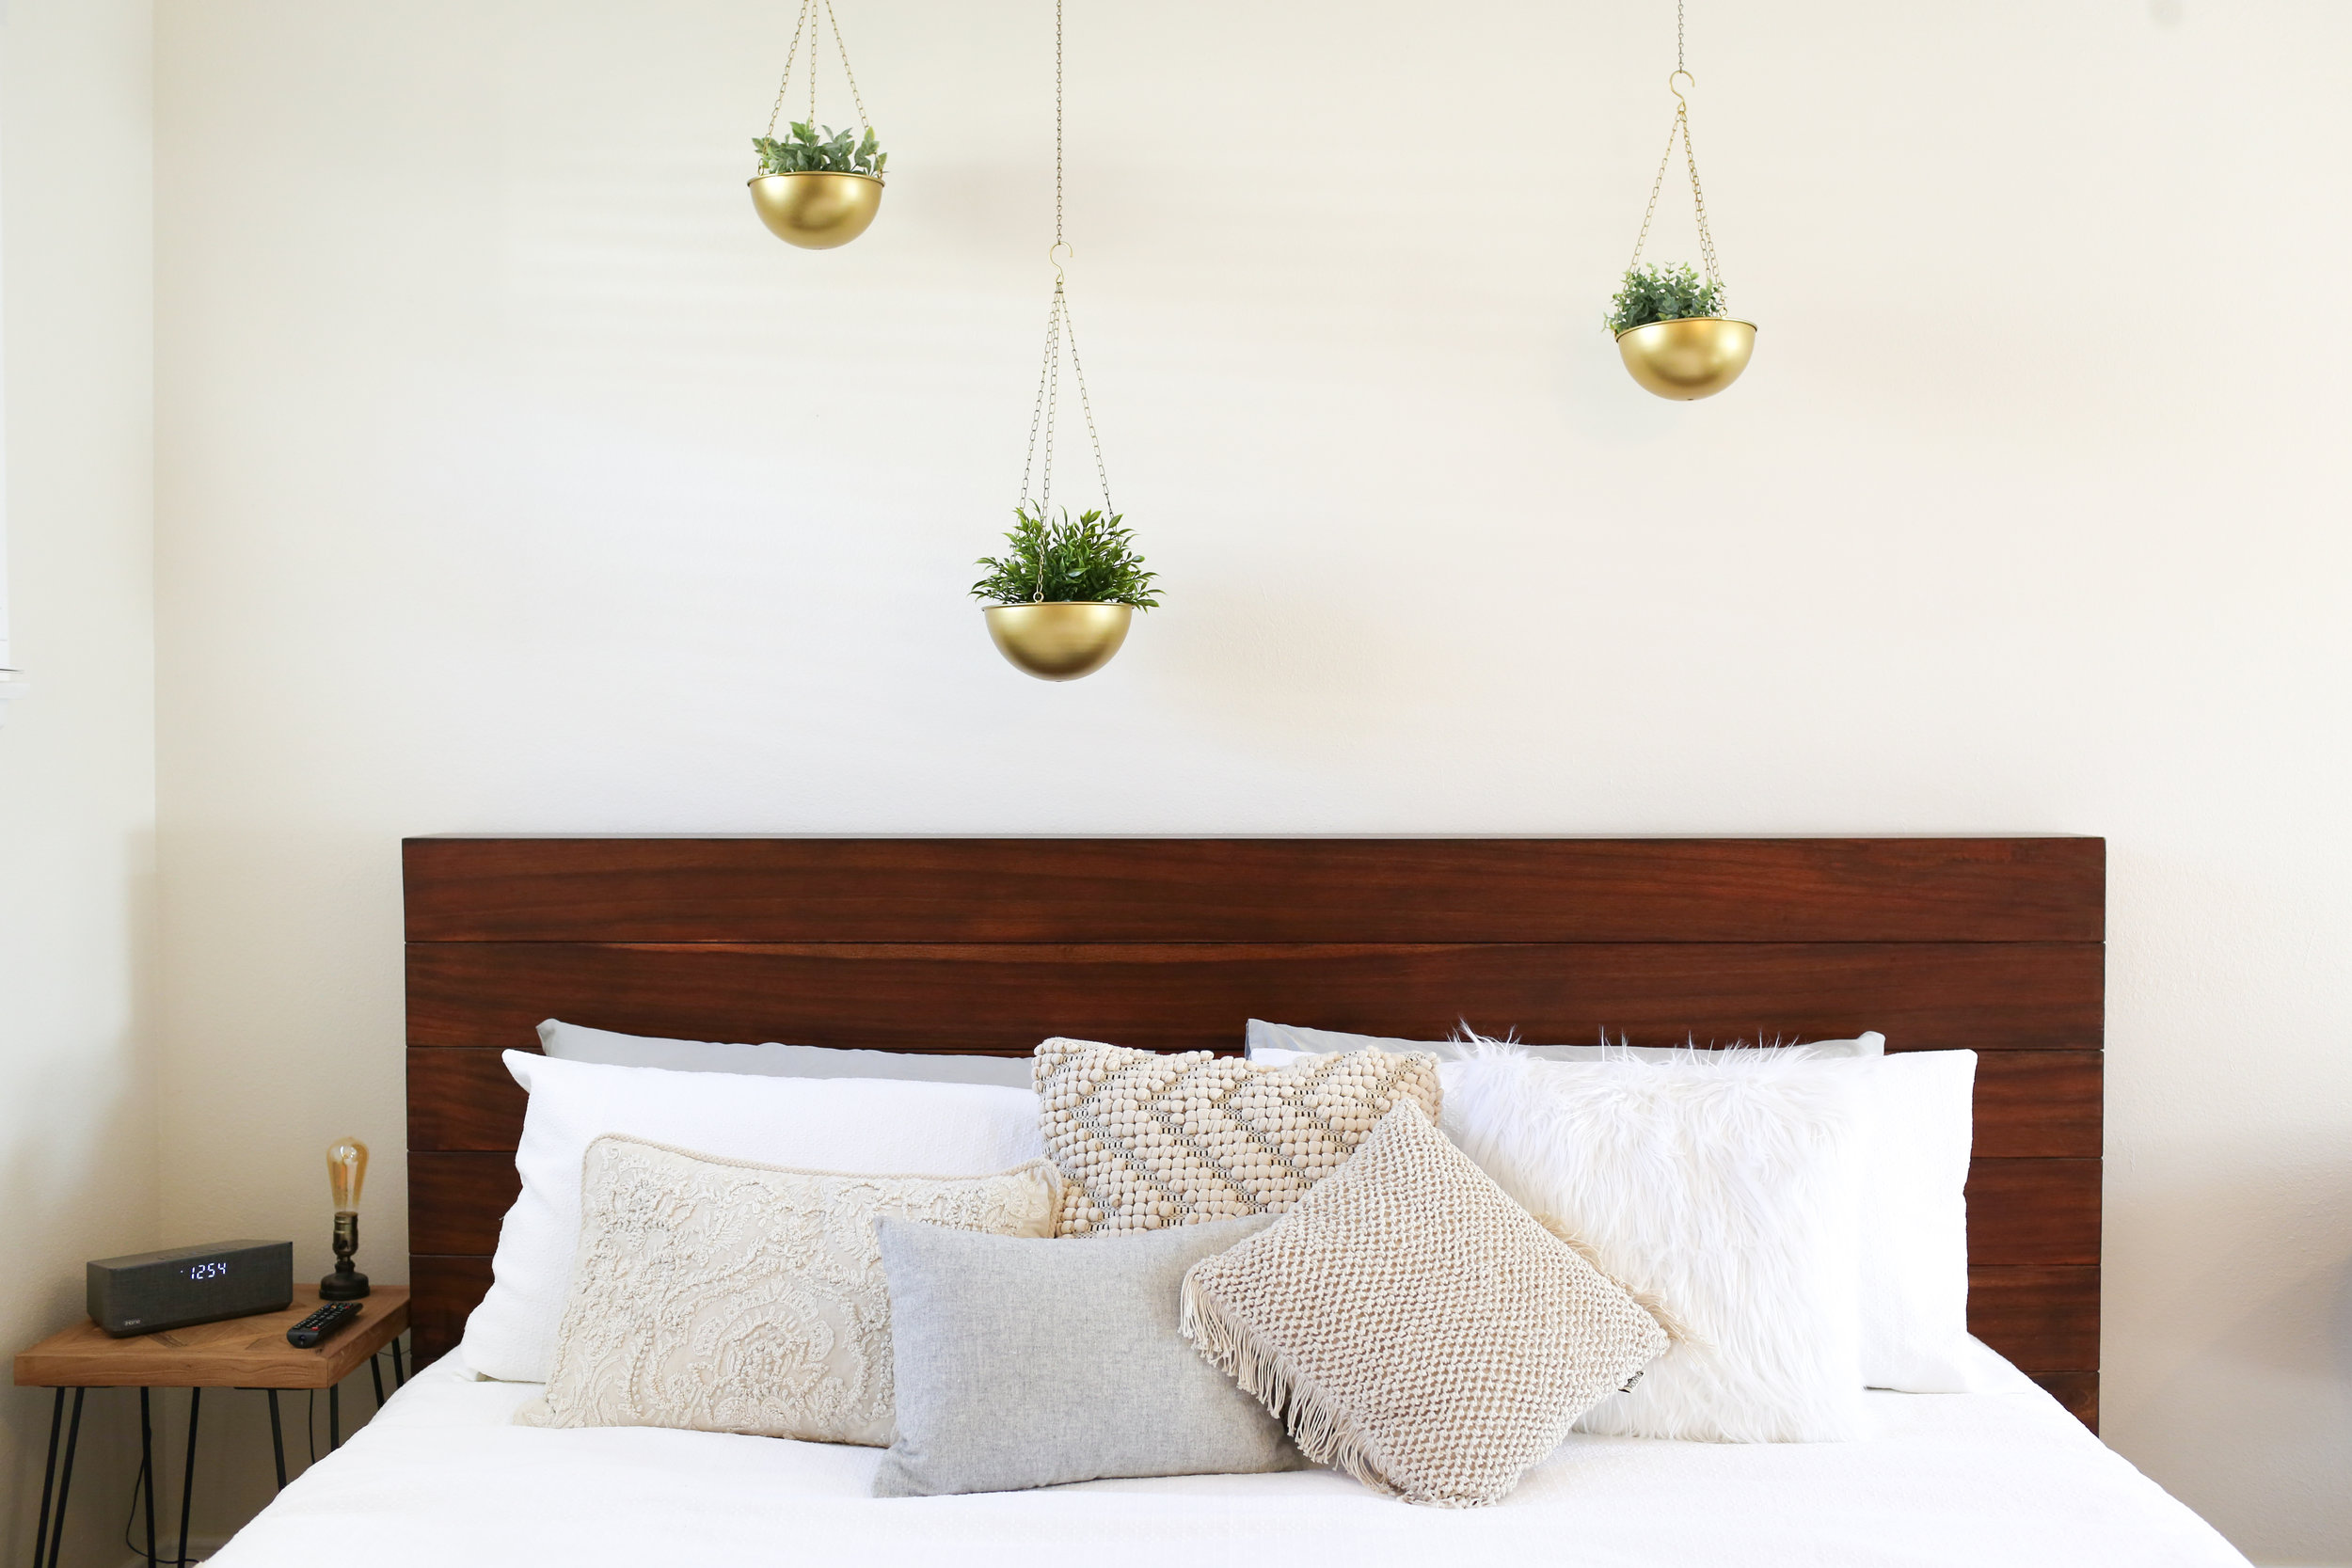
Click on the bedframe ^ and see the full Air BNB! Stay with us if you’re ever traveling to the OC, LA, or Long Beach!
and last but not least,

The Studio: Up & Coming!
We can’t disclose too much, but we are excited to begin renovating another unit this year!
My favorite part? That I get to design a space again … who knew designing an entire place is so fun?!?
Thanks mom for being my sign model ;).

That is all for now!
Love you guys, we are here to help with anything we can on your own home renovation adventures!
Ask us any questions, we’re here all day! (& maybe a few more years)
xx
Matt & Natalie
March 2018
Last year, March 2017, Matt & I purchased our first home 6 miles from the beach. I couldn't believe it. What the heck?! What a crazy blessing!
Since it's California, and since a turn-key home didn't sound like fun (or affordable)...
We got a wonderful FIXER UPPER!

It's already been such a journey fixing up this old 50's house. The TLC we get to invest into it, I think, makes me see it as "our home!" even more.
And let me just back that phrase up real fast... we wouldn't be ANYWHERE without the help of our families, who dedicate a lot of their weekends to coming over and helping us FIX IT UP ourselves!

Here's a little throw back to March of 2017 when we first bought the house!
There was this huge pantry wall RIGHT when you opened the (pretty teal) front door. It took up so much unnecessary space, that the first thing we decided to do was KNOCK THIS BAD BOY OUT.
Open concept, anyone? ;)
I'll show you guys a little before and after later...
But for now...
I'm so pumped on our current project: FLOORS + INSIDE DOORS.

When Matt and I sat down to think about what to do with the floors a few months ago, we realized that no previous owner had done any updating -- they were the original hard wood panels from the 50's (left photo) -- which is kinda cool! But let me tell you, there was no more life left in them!
The wood had been refinished so many times, that it might as well have been a piece of paper left on the floor!
So replacement became the gameplan! We went with a new type of laminate floor. Why? Because
1. It can look & feel identical to wood
2. The durability of some laminate is outstanding (where no wood compares)
and 3. It is more affordable than wood.
Sorry wood :/. (Praise God for all these new options!)
It's taken Matt & our dads about 2 full weekends working nonstop to lay our new floor everywhere but the kitchen & bathrooms (where we hope to do tile)! So darn excited!
(& as for the color, I can't wait to explain our concept behind our choices in another update!)
And as for internal doors, we switched out the older for the newer:

With the new doors, we still need to paint them, hence the more matte look!
And to be honest, my heart secretly loves the old doors... so I am currently holding them hostage from the trash can, figuring out how to rescue them from a terrible fate! Just because you're old doesn't mean your life is over ;).
Thank you guys for checkin in!
More TLC updates to come!
xx Natalie & Matt